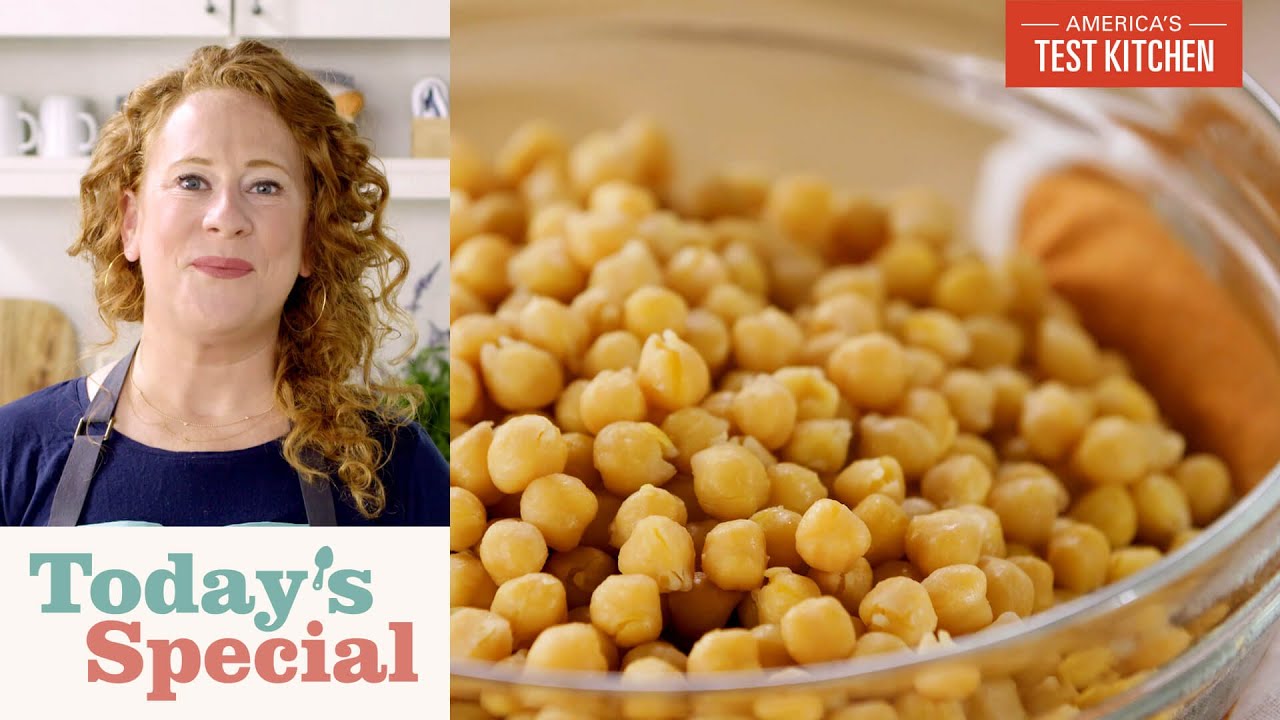
How to Cook Dried Chickpeas in a Multicooker | Today's Special
For more great Instant Pot recipes, please visit InstantPotEasy.com
Dried chickpeas can be convenient to keep in pantry, but preparation can take a few hours. Here’s how cook them quickly in a …


Salt? Nope.
Happy holidays to you and yours
I love this method of cooking chickpeas. So easy. 👍They turned out great! Thank you for sharing. 🤗
Why draining after cooking? I usually add some water and pasta and make a very flavourful soup, I guess draining would be beneficial for salads or hummus?
I'm still unsure of the benefits of spending 24+ hours and several dirty dishes to cook dried chickpeas, instead of just keeping a few cans of them in the pantry, and then rinsing and draining them when needed. Not trying to be difficult, just genuinely curious.
Never worth it to let the pressure release naturally.
@ 01:01
The RSVP colander; love that thing.
Thanks ATK for that recommendation.
It's a favorite, now.
Why would you want to keep the skins on?
A few things that will yield higher quality results, both in flavor and texture:
1. What you have created is known as an "Equilibrium Brine" of 1%, which is exactly as it should be for chickpeas to express their natural flavor and have it properly recognized by your tastebuds. This is done by taking the COMBINED mass of the chickpeas AND water, then moving the decimal to the left two positions. So the 454 grams of chickpeas and 1,893 grams of water made a total mass of 2,347 grams. 1.5 tablespoons of salt is approximately 24 to 26 grams, depending on crystal size, so this is an Equilibrium Brine of 1%. This means you can, as this video says, leave them brining for 24 hours without them getting too salty because even with 100% hydration — no matter how long that takes — the chickpeas will ALWAYS have only 1% salt content added from the water.
2. But this brings me to the first mistake: rinsing the chickpeas in fresh water. This is absolutely unnecessary. At this point in the process the salt has already fully permeated the chickpeas, so just discard the brine and then put the drained chickpeas into the Instant Pot.
3. Now as for the cooking liquid, make a 1% brine from NEW water this time and cook the chickpeas in that. Take the mass in grams of the water you are about to cook in, move the decimal point two places to the left, and that is the mass in grams of the salt you should dissolve in the cooking water.
4. Too much cooking liquid was used in this video. If you cook the chickpeas in more water than is necessary, you dilute the flavor of the chickpeas.
Cooking liquid is the solvent; chickpeas are the solute. The less saturated the solvent is with a solute, the more of the solute it can dissolve into a solution, and in this case that solution — the cooking liquid — will be discarded. This solute is the flavor compounds that give the chickpeas their flavor. So the more liquid one uses, the more flavor that will be leached from the chickpeas and discarded after they are cooked.
Soaked chickpeas need only enough cooking liquid to BARELY cover them completely. You are pressure-cooking; the cooking liquid is mostly trapped by the Instant Pot rather than evaporated, so you won't lose much at all.
And less cooking liquid means less time to come to pressure, too, which means your chickpeas won't sit there in hot water any longer than necessary. You want a soft chickpea that has just enough structure to not fall apart in your mouth into a loose, mealy paste.
Also, there is no need for oil in the cooking liquid. If you follow my advice, you will be cooking in so little water that no amount of foaming could even creep halfway up the cooking pot. Save the olive oil for when you make Hummus bi Tahine.
5. Trying to keep the skins intact is only useful for dishes where the chickpeas will be used whole, such as Chana Masala or other chickpea curry. For Hummus bi Tahine you will want to take the time to rub them gently between your palms in a shallow pool of water, then skim-off the floating skins. Those skins contain a lot of structural Pectin which is very strong and doesn't break down in a food processor very well. Once you try Hummus made from skinless chickpeas, you will never go back.
6. Six minutes is too long of a cook time — especially with all that extra water, which will take many extra minutes to come to a pressurized boil. If you use the amount of water I recommend, Pressure Cook on Low for 5 minutes. But read Step 7 before you do…
7. NEVER use the depressurization valve — even when you THINK it's done depressurizing. You can tell when the Instant Pot is FULLY depressurized by looking at the red button indicator on the lid: UP means still under pressure, DOWN means fully depressurized.
Also note that she said it takes about 15 minutes to depressurize — even though she only PARTIALLY depressurized before popping the depressurizing valve. This is another drawback to using that massive amount of cooking liquid: it stores a massive amount of heat, which takes much more time to cool down and, correspondingly, depressurize.
Depressurization is NOT a trivial thing. Fast depressurization gives your pressure-cooked food the equivalent of "the bends," which is what kills sea divers when they surface too quickly from staying at depth. In your food's case, it damages the texture of the interior to some extent depending on the food, cooking temp and time, pressure, etc. But in all cases it yields a lesser result. So NEVER use that depressurization valve, please.
Thankfully, the folks who make the Instant Pot also make a very useful device they call the "QuickCool Tray," which lowers the pressure at a rate that is as fast as is possible without damaging the texture of food in any way. It is a stainless steel-bottomed silicone bladder you fill with tap water and then freeze. When pressure cooking is done, you place the steel bottom on the Instant Pot lid (under the removable screen), and the ice conducts the heat from the Instant Pot at the exact correct speed to depressurize with perfect results. I use this every time (just yesterday with chickpeas, in fact) and wouldn't pressure-cook without it. It's the best ten bucks you'll ever spend.
8. Turn off "Keep Warm" when you pressure-cook. Once the timer goes off your chickpeas have had all the thermal energy transferred to them they'll ever need. And if you don't get there to press Cancel right when the Instant Pot timer sounds, it will just take that much longer to depressurize.
9. Floaters are not uncooked chickpeas, but I would discard them anyway for not conforming to expectations like all the properly-disciplined little chickpeas into which you've put all your efforts.
10. Put your leftover chickpeas into the refrigerator as soon as you can. Do not leave them out at room temperature until they have cooled to room temperature. If you did this as a restaurant owner and the Health Inspector caught you, she would majorly ding your Inspection Report. Your goal is to remove thermal energy quickly, but not so quickly as to damage the texture as flash-freezing would, and that means immediate refrigeration. Leaving them out at room temperature for an hour or two is not good food safety.
I hope this helps.
Are these cooked chickpeas supposed to be stored drained, or submerged in water? Wouldn't storing them drained let them dry out or oxidize too easily?
"it's so fast… as long as you remember to start the night before by brining them" THAT IS NOT FAST! I have an instant pot because sometimes I don't know I want to make something until RIGHT BEFORE I MAKE IT. F-
This is the exact same video upload last year. https://www.youtube.com/watch?v=BnqbLZTUVtc
I thought you wanted to remove the skins. Is that just for hummus?
I don't bother to soak. I just put dry chickpeas in my pot, cover with 3 or 4 times the amount of water, pressure cook on high for 45 minutes, let cool naturally.
Adjust the amounts and time to work for your pot.
This makes "al dente" chickpeas with no seasoning, that can be added to other dishes during cooking.
If you have a pressure cooker, you don't need to soak overnight or at all. Measure a pound of chickpeas and add them in with seasoning, fill the pot to half with water and close the valve after it starts boiling. At this exact point lower the heat to low and let it cook for 1 hour or maybe a little more, depends on the variety. Leftover water which they didn't soak is fresh aquafaba. Don't add too little water because they soak it good, 1 pound of peas will rise up to half of that size of a pot easily. After cooking if you drain and rest them in a closed well insulated container they obtain a delightful nougat like texture. However they are terrible with this method for humus since the skins are left on. (If you don't know how to use a pressure cooker and things are showing resistance, don't hurt yourself and ask for help)
And since you've brined them so the skins don't come off during cooking, how does one remove the skins after cooking, without having to actually peel each one. You get a smoother hummus if the chickpeas are peeled.
I guess I will just assume that with two quarts of water, the type of salt in the 1.5 tablespoons isn't critical.
However, I have to say, I just can't help wondering why you "kitchen science geeks" aren't being a little more specific when it comes to the amount/type/concentration of salt?
Why not
1st pressure recipe I have seen using low pressure!
Will be using this in your chick pea soup recipe
Thanks
This is pretty much the same video you guys did in April 2020. https://www.youtube.com/watch?v=BnqbLZTUVtc
but what about all that bean juice? down the drain!?!
For storing cooked chickpeas in the fridge: do you add water and use a storage container or just store them dry in a ziplock? I’ve seen it done both ways? Do you do it differently if you are freezing them? Thanks!
I love you 💙💚❤also your cooking videos thanks for sharing 💙💚❤
Hi. Thank you for this video but two questions. You said the brine helps keep the skins intact but yet when making the best hummus a lot of recipes say to remove the skins so can this step be skipped or can baking soda be added to the pressure cook?
Also if using olive oil will the cooking liquid be good for aquafaba to use in baking and I guess if you can add baking soda as I’m asking above can this be used for aquafaba or does the liquid need to be discarded if adding anything other than water and salt.
Thank you
More instant pot recipes please
Are they can chick peas
What is the benefit of pressure cooking on low rather than high? Can I omit the oil? And ….once cooled, can I freeze them for later?
Not a fan of chick peas. Loooooove hummus though!
Steam cooking for ~40 minutes and the chickpeas are crispy and tasty.
Canyon do a video with navy beans and Lima beans in the instant pot? Especially the time?
Can you do a video with navy beans also using the Instant pot?
1 'quart' is 0.946353 liters for the rest of the world or I suppose about 940ml
Can you do this in a slow cooker
Puree them with tahini and garlic and olive oil, put in the fridge for 8 hours and perfect hummus…
I do not have a multicooker; can you please share how to cook these in a regular pot? I’ve tried adding baking soda to the overnight soak, and then adding a little more about 15 minutes after they’ve been simmering after coming to a boil; i also add some sliced carrots and chopped onions when cooking, along with a bay leaf or two